If you’re a product designer, you’ve definitely come across snelle prototype CNC at some point. Maybe you’ve heard teammates throw it around, or seen it on service websites, but never really sat down to figure out how to use it properly in your own workflow. That’s exactly why I put this guide together—no fancy jargon, just real stuff that helps you do your job better.
I’ve worked on enough physical products to know: the difference between a smooth launch and a messy, over-budget disaster often comes down to how you handle prototypes. And CNC is one of those tools that can either save you or stress you out, depending on how well you understand it.
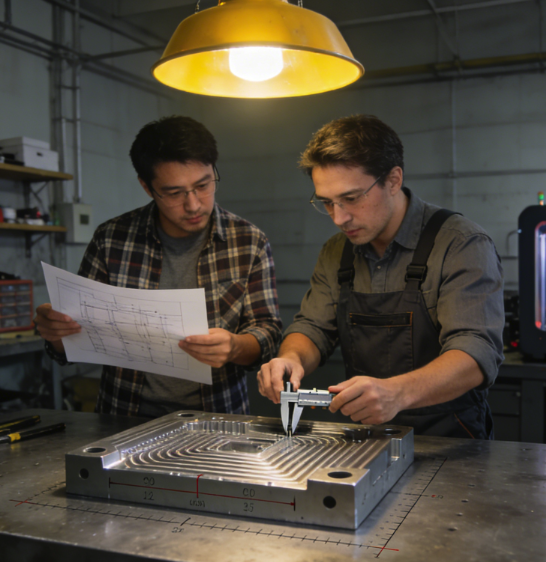
Let’s start simple: what this tool actually does
You don’t need a engineering degree to get this. At its core, snelle prototype CNC uses computer-controlled machines to carve parts from solid blocks of material—plastic or metal.
What makes snelle prototype CNC so useful for us designers? It gives you a real, sturdy part that acts almost exactly like your final production piece. You can test fit, montage, duurzaamheid, and even how it feels in hand. Unlike some quicker methods, the result from snelle prototype CNC is reliable enough to make real design decisions.
That’s the whole point: catching mistakes early, before you sink money into mold tooling that’s impossible to fix cheaply—something snelle prototype CNC excels at.
Materials you’ll actually use (not the textbook list)
I’m not gonna list every material under the sun. These are the ones you’ll actually reach for, project after project.
For plastics: ABS is your everyday workhorse—easy to machine, good for most housings and enclosures. PMMA is great when you need clarity, like light guides or display parts. If you need something stronger and heat-resistant, there are higher-performance plastics too, but they cost more.
For metals: aluminum is the default. It’s light, machines quickly, looks professional, and works for everything from brackets to finished-looking exteriors. Stainless steel is stronger but slower and pricier, so I usually only use it for functional prototypes that really need that level of strength.
My rule of thumb: use the same material family as your final product whenever possible. Testing with a random plastic might give you false confidence, and that’s how mistakes slip through.
How to prep your CAD so things don’t go wrong
From what I’ve seen, most delays and extra costs with snelle prototype CNC aren’t from the machine shop—they’re from messy CAD files. Here’s what actually matters.
First, clean up your geometry. Small gaps, overlapping surfaces, and broken edges might not look like a big deal on screen, but they’ll turn into actual defects on your physical part when using snelle prototype CNC. Take 15 minutes to fix them before you send the file over.
Second, be clear about tolerances. Don’t just write “as precise as possible.” Think about which features actually matter for yoursnelle prototype CNC part. A cosmetic cover doesn’t need super tight tolerances. A hinge or a slot that needs to fit perfectly? That’s where you need to be specific.
Third, label critical features. Tell the shop which dimensions are non-negotiable for your snelle prototype CNC order. It helps them prioritize where to spend time and attention, and it keeps you from getting a part that looks right but doesn’t function.
And finally, simplify when you can. Crazy internal shapes are hard to machine with snelle prototype CNC. If a feature isn’t necessary for testing, save it for the final design.
When to pick this over 3D printing
A question I get all the time: should I use CNC or 3D printing?
Here’s my real-world take:
Use 3D printing for early concept models, weird organic shapes, and quick visual checks. It’s fast and cheap for that stage.
But when you need real material properties, tight tolerances, functional testing, or parts that can handle stress and heat? That’s where this process shines. It’s not always the fastest, but it’s often the most trustworthy when you’re getting serious about validation.
Mistakes even senior designers make (and how to skip them)
I’ve made these, my friends have made these, and I see clients make them all the time.
One: ignoring wall thickness. Too thin and the part might break during machining or testing. Check the minimums for your material ahead of time.
Two: forgetting about tool access. Sharp internal corners can’t be cut with round tools. Add a small radius if you can, or be ready to pay more for extra work.
Three: rushing into mass production. I’ve watched teams skip proper prototyping to hit deadlines, only to pay way more fixing molds later. Don’t be that team.
Four: not talking to the manufacturer. A quick message to clarify expectations can prevent a part that’s technically correct but completely useless for your project. Communication goes a long way.
How to pick a shop you can actually trust
Not every machining service is built for designers. Some only do high-volume production and hate small prototype orders.
Look for a few things:
- They actually specialize in prototypes, not just mass production.
- They give clear quotes and lead times, no hidden fees.
- They give feedback on your design instead of just cutting what you send.
- They can show you real samples or case studies similar to your project.
A good partner doesn’t just execute your order—they help you make better parts.
Wrapping this up
At the end of the day, snelle prototype CNC is just a tool. But it’s one that lets you turn ideas into something you can touch, test, and trust.
You don’t have to be an expert in machining. You just need to understand the basics, clean up your files, pick the right materials, and work with people who get what designers need. Do that, and you’ll spend less time fixing mistakes and more time shipping products you’re proud of.
Hope this guide helps with your next project. If you’ve got any stories or headaches from your own prototyping journey, feel free to drop them in the comments—I’d love to hear them.