If you are aiming to manufacture high-performance components, alu cnc machining is likely the backbone of your production line. Aluminum is lightweight, incredibly durable, and highly machinable. However, cutting the metal is only half the battle. To truly make a product stand out, mastering the art of the alu polish is what separates a crude prototype from a premium, retail-ready masterpiece.
Whether you are designing custom automotive parts, aerospace components, or sleek consumer electronics, achieving that flawless blend of precision and aesthetics requires a deep understanding of both subtractive manufacturing and surface finishing. Let’s dive into how you can optimize your alu cnc workflows and perfect your alu polish techniques to get the ultimate high-gloss finish.
Why Alu CNC Machining is the Industry Standard
When we talk about alu cnc (aluminum Computer Numerical Control) machining, we are talking about the sweet spot of modern manufacturing. Aluminum alloys—such as 6061-T6 or 7075—offer an exceptional strength-to-weight ratio. But why do machinists love it?
- High Machinability: Aluminum cuts like butter compared to titanium or stainless steel. This means faster cycle times, less tool wear, and ultimately, lower production costs.
- Thermal Conductivity: It dissipates heat rapidly during the cutting process, reducing the risk of part distortion.
- Odporność na korozję: Aluminum naturally forms a protective oxide layer, which can be further enhanced through post-processing.
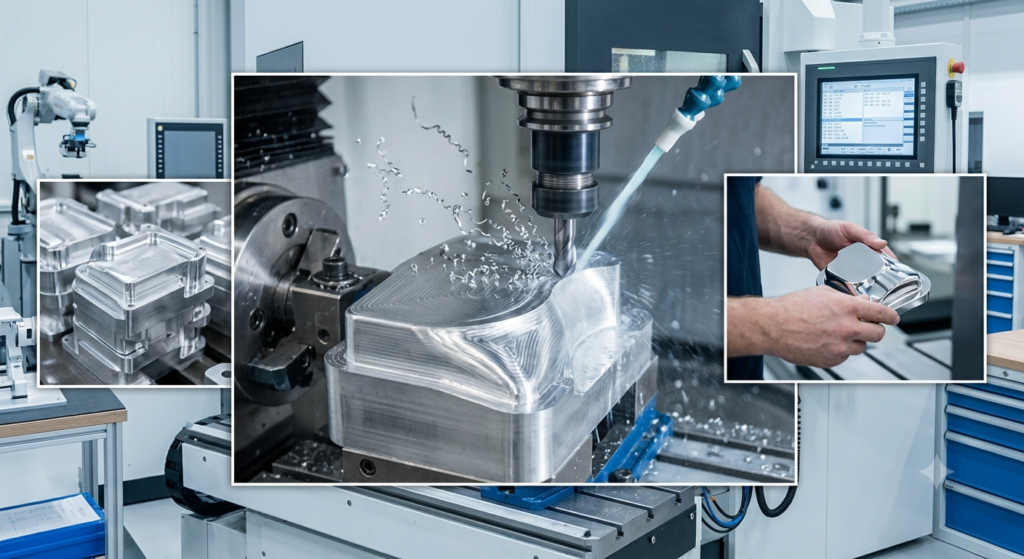
However, even the most advanced 5-axis CNC mill leaves behind tool marks. Those tiny ridges and valleys might look okay on an internal structural bracket, but for external consumer-facing parts, they just won’t cut it. That is where post-machining surface treatments come into play.
The Crucial Step: Transitioning from CNC to Alu Polish
You can’t just take a fresh piece out of an alu cnc machine and throw it straight onto a buffing wheel. If you do, you will just end up with a shiny piece of metal that highlights every single tool mark and scratch. The transition from milling to an elite alu polish requires a systematic approach.
1. Deburring and Smoothing
First, you need to knock off the sharp edges and burrs left behind by the CNC cutters. This can be done manually or via vibratory tumbling bowls filled with ceramic or plastic media.
2. Progressive Sanding (The Secret to Mirror Finishes)
If you want a true mirror-like alu polish, you must embrace progressive sanding. Start with a coarser grit (around 400 grit) to erase the CNC tool paths. Gradually work your way up through 800, 1000, 1500, and finally 2000 grit.
Pro Tip: Always change your sanding direction by 90 degrees with each progressive grit. This allows you to visually confirm that you have completely erased the scratches from the previous step.

Mastering the Alu Polish: Compounding and Buffing
Once your alu cnc part is perfectly smooth and has a dull, satin look, it’s time for the actual alu polish stage. This is where the magic happens, transforming raw aluminum into a chrome-like surface.
The Two-Step Buffing Process
To get a professional-grade finish, you generally need a bench grinder or a rotary tool equipped with cotton buffing wheels and polishing compounds.
| Step | Wheel Type | Compound Type | Result |
| Step 1: Cutting | Stiff Airway or Spiral Sewn Cotton | Tripoli (Brown) Compound | Removes remaining fine scratches and prepares the metal. |
| Step 2: Coloring | Loose Flannel or Soft Cotton | Jewelers Rouge (White/Green) | Brings out the deep, mirror-like reflection and high luster. |
When applying the compound to the wheel, less is more. Let the spinning wheel graze the compound bar lightly. Pressing too hard will cause caking, which actually scratches the aluminum rather than polishing it. Keep the part moving constantly across the wheel to avoid localized overheating, which can cause a cloudy, distorted finish.
Protecting Your Polished Aluminum
Here is the hard truth about aluminum: it loves oxygen. The moment you finish your perfect alu polish, the metal begins to react with the air to form an oxide layer. While this layer protects the metal from rusting, it also dulls the brilliant shine you just worked so hard to achieve.
To lock in that mirror finish, you have three main options:
- Clear Anodizing: This provides the hardest, most durable protection, though it may slightly reduce the absolute mirror brightness.
- Ceramic Coating: A modern, highly popular choice that bonds at a molecular level to seal out moisture and UV rays without altering the look.
- High-Quality Wax/Sealant: A budget-friendly option that requires reapplication every few months but keeps the shine pristine.
Summary: The Perfect Synergy
In the manufacturing world, alu cnc machining and alu polish are two sides of the same coin. The CNC machine provides the flawless structural geometry and tight tolerances, while the polishing process injects luxury and premium aesthetics into the final product. By optimizing your machining parameters to minimize tool marks and following a disciplined, multi-step polishing regimen, you can create aluminum products that look as good as they perform.
Często zadawane pytania
Which aluminum alloy is best for an alu polish?
While most alloys can be polished, 6061-T6 I 7075 aluminum are excellent choices for both alu cnc machining and polishing. They are hard enough to be machined cleanly and take a brilliant shine without “smearing” during the buffing phase.
How do I remove deep CNC tool marks before polishing?
Start with 320 or 400-grit wet/dry sandpaper. Sanding wet helps lubricate the surface and prevents the aluminum dust from clogging the paper, leading to a much smoother transition to the finer grits.